Microsoft Azure
This app allows you to synchronize your Microsoft Azure assets into Badrap and to receive security notifications about them. The app fetches a list of your organization's public network assets from your Azure installation with your consent, and adds those assets under your Badrap user account. The asset types listed are:
- Public IP addresses from your Azure installation
- DNS records (A, AAAA, CNAME, MX, NS) from all public DNS zones managed by Azure
- Azure DNS alias records
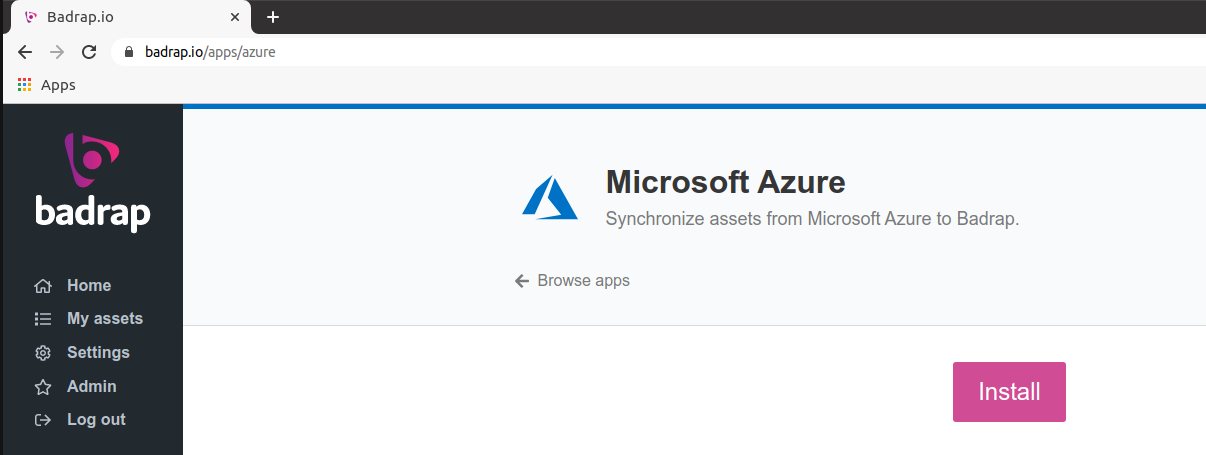
Install the Azure app in Badrap
Anyone can install the Azure app in Badrap, but you will need Global Administrator, Application Administrator or Cloud Application Administrator level privileges to enable the app to access your Azure installation and to list your assets from there. If you do not have administrator role privileges, refer your administrator to these instructions and ask them to help you with the app configuration.
Open the Azure app page.
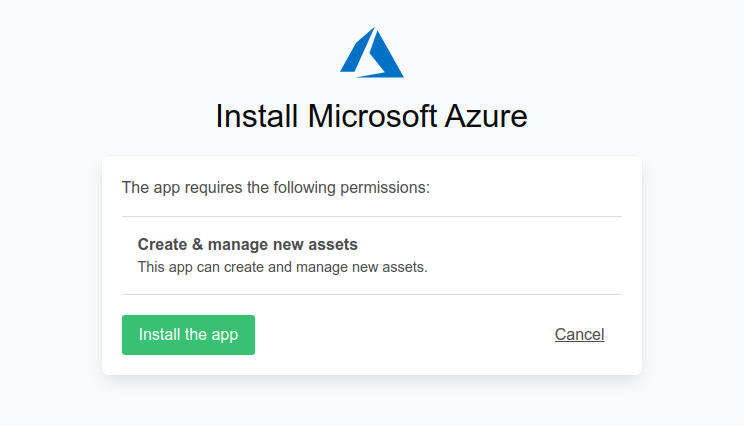
The app asks for your consent to create & manage new assets. Click Install the app.
The Azure app is now installed. Next, you have to create a service principal for the app in your Azure installation, and to provide its configuration details to the app settings. You can do this either by using the Azure CLI (incredibly easy) or your Azure Portal (still easy).
Using the Azure CLI
Note that installing Azure CLI to your computer is outside of the scope of this guide. You can use Microsoft's Azure CLI installation instructions to get started if you haven't installed it previously.
Log into Azure using your Azure CLI utility.
az loginList your subscription details:
az account showThe listing will look like this:
{
  "environmentName": "AzureCloud",
  "homeTenantId": "aaaaaaaa-bbbb-cccc-dddd-eeeeeeeeeeee",
  "id": "11111111-2222-3333-4444-555555666666",
  "isDefault": true,
  "managedByTenants": [],
  "name": "Pay-As-You-Go",
  "state": "Enabled",
  "tenantId": "aaaaaaaa-bbbb-cccc-dddd-eeeeeeeeeeee",
  "user": {
    "name": "adminroleuser@example.com",
    "type": "user"
  }
}
Make a note of the id field value (subscription ID) for the next step. If you want to add multiple subscriptions, make a note of all of their IDs.
Use the
az ad spcommand to create an application as a service principal with Reader role privileges. Substitute{subscription_id}in the example below with the id value you noted down previously. Note that the--nameparameter is optional and you can define any name you want for the service principal.az ad sp create-for-rbac --role "Reader" --scopes /subscriptions/{subscription_id} --name http://BadrapAzureAppThe output will look like this:
Creating 'Reader' role assignment under scope '/subscriptions/11111111-2222-3333-4444-555555666666'
  Retrying role assignment creation: 1/36
The output includes credentials that you must protect. Be sure that you do not include these credentials in your code or
check the credentials into your source control. For more information, see https://aka.ms/azadsp-cli
{
  "appId": "aabbccdd-1122-3344-5566-eeeeffff7777",
  "displayName": "BadrapAzureApp",
  "name": "http://BadrapAzureApp",
  "password": "****************************",
  "tenant": "aaaaaaaa-bbbb-cccc-dddd-eeeeeeeeeeee"
}
If you want to add access to multiple subscriptions, simply include all of their IDs after the
--scopesparameter, separated with spaces:az ad sp create-for-rbac --role "Reader" --scopes /subscriptions/{subscription_id1} /subscriptions/{subscription_id2} --name http://BadrapAzureAppIf you want to restrict the permissions of the service principal even further, instead of the default Reader role you can create a custom role and assign it to the service principal. The custom role needs to have permissions to only a few resources. First, create the service principal without assigning any role to it.
az ad sp create-for-rbac --skip-assignment --scopes /subscriptions/{subscription_id} --name http://BadrapAzureAppThen, create your custom role with only minimal privileges:
az role definition create --role-definition '{
    "Name": "CustomReaderBadrapApp",
    "Description": "Custom restricted Reader role for Badrap Azure app",
    "AssignableScopes": [
            "/subscriptions/445566eeff-2222-aaaa-ffff-112233aabbcc"
    ],
    "Actions": [
        "Microsoft.Network/publicIPAddresses/read",
        "Microsoft.Network/dnszones/read",
        "Microsoft.Network/dnszones/all/read"
    ],
    "NotActions": [],
    "DataActions": [],
    "NotDataActions": []
}'
Lastly, assign the custom role to the service principal you created earlier:
az role assignment create --role "CustomReaderBadrapApp" --assignee http://BadrapAzureApp --scope /subscriptions/{subscription_id}Under your Badrap Azure app settings, add your account details.
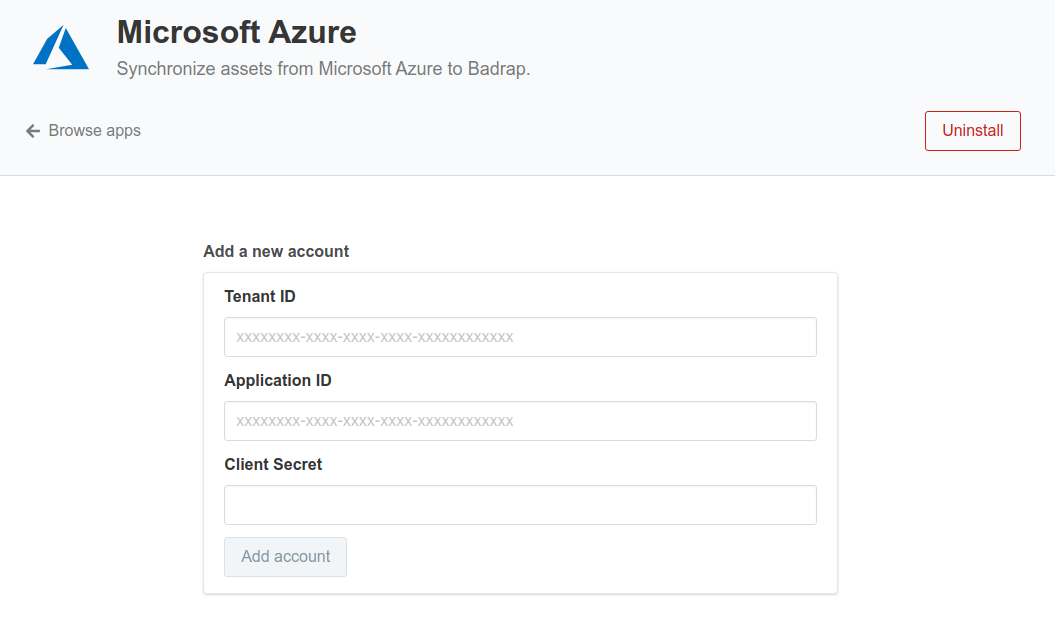
Copy the tenant, appId and password values into the app settings:
- Tenant ID:
tenant - Application ID:
appId - Client Secret:
password
- Tenant ID:
In a few minutes after the Badrap Azure app has been configured into use, you should see a listing of your Azure assets under My Assets.

Using Azure Portal
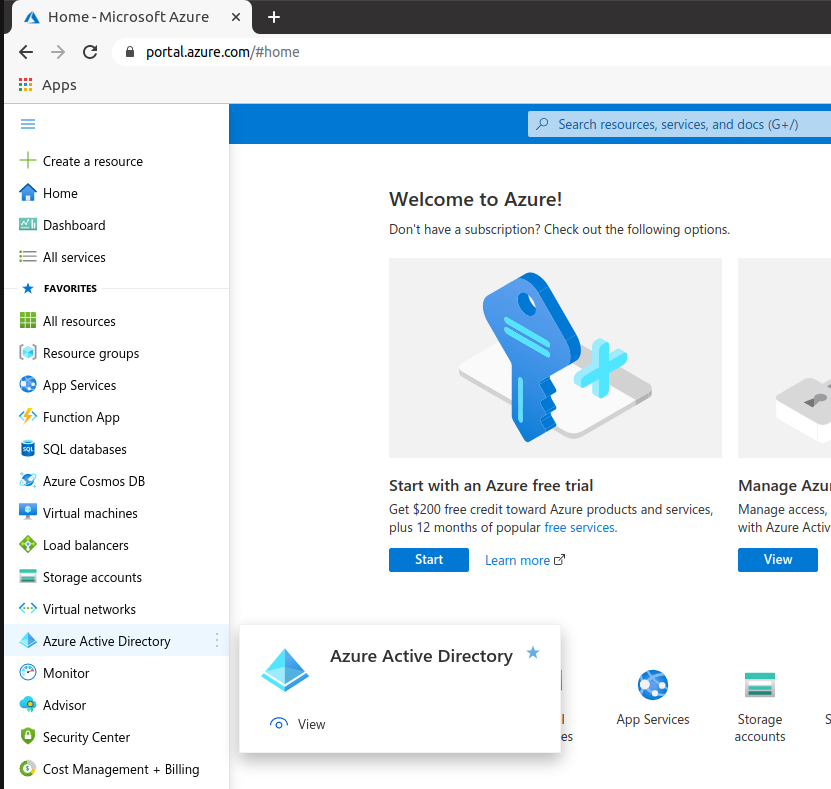
Log into your Azure Portal. Select Azure Active Directory from the sidebar.
Go to App Registrations.

Click New registration. Enter the following details:
- Name: Badrap Azure App
- Supported Account Types: Accounts in this organizational directory only (your organization only)
- Redirect URI (optional): leave blank
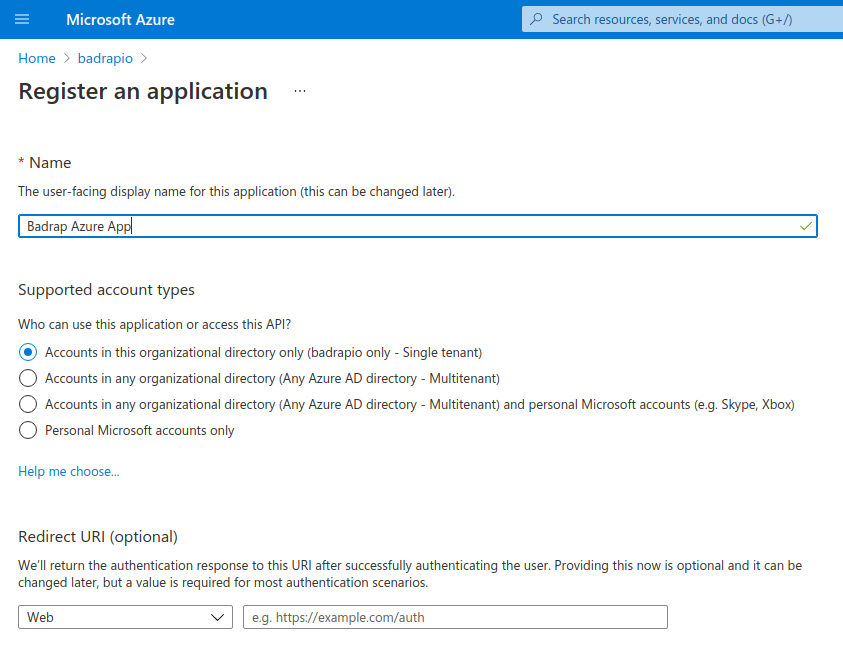
Click Register to complete the new app registration.
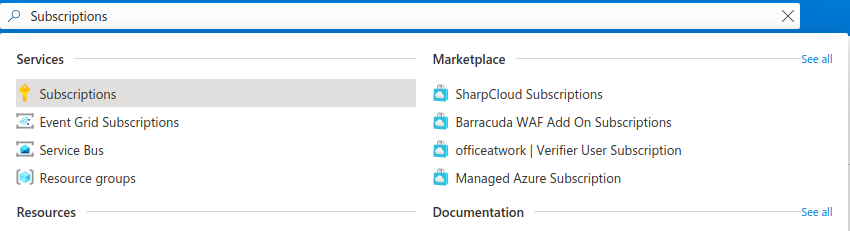
Now, give Reader permissions to the application. Go to Subscriptions via the Azure Portal top search bar or via the left sidebar.
Choose the subscription you want to use. If you have multiple subscriptions that you want to add, you can just repeat steps 6-10 to add access to all of them.

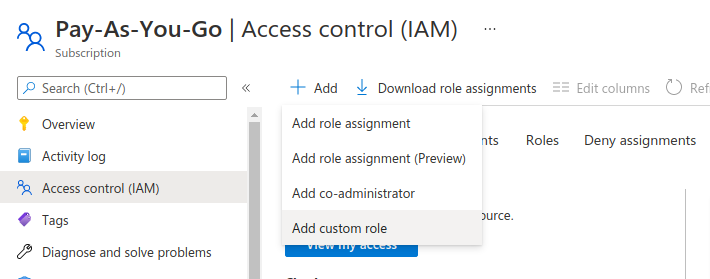
Select Access Control (IAM) in the subscription page.

Click Add and select Add role assignment.
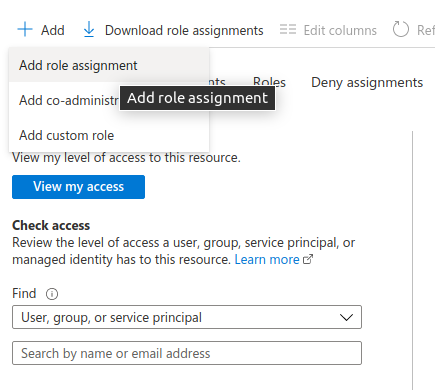
For "Role", select Reader. For "Assign access to", select User, group or service principal.
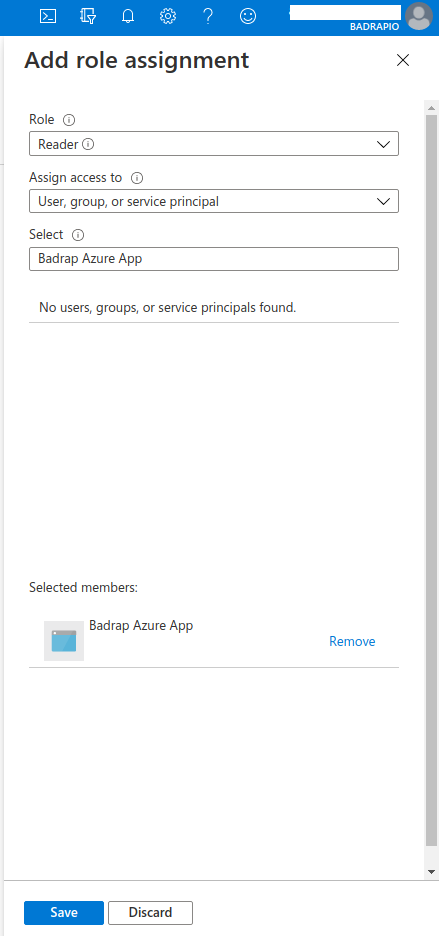
In the Select menu, type the name of the application you created in the previous step (e.g. "Badrap Azure App") and click on the search result. The app should now appear in the "Selected members" list. Then click Save.
If you want to restrict the permissions of the service principal even further from the default Reader role, you can create a custom role and assign it to the service principal. The custom role needs to have permissions to only a few resources. First, under the Access Control (IAM) page under your subscription (see step 7 above), create your custom role with only minimal privileges by clicking Add and selecting Add custom role.
Under the "Basics" tab in the "Create new role" dialog, create a name for your role under Custom role name, e.g. "CustomReaderBadrapApp". For Description, write down the purpose of the custom role, e.g. "Custom restricted Reader role for Badrap Azure app service principal". For Baseline permissions, select Start from scratch.

Under the "JSON" tab in the "Create new role" dialog, edit the JSON to look like this:
{
    "properties": {
        "roleName": "CustomReaderBadrapApp",
         "description": "Custom restricted Reader role for Badrap Azure app",
        "assignableScopes": [
             "/subscriptions/445566eeff-2222-aaaa-ffff-112233aabbcc"
        ],
        "permissions": [
            {
                "actions": [
                    "Microsoft.Network/publicIPAddresses/read",
                    "Microsoft.Network/dnszones/read",
                    "Microsoft.Network/dnszones/all/read"
                ],
                "notActions": [],
                "dataActions": [],
                "notDataActions": []
            }
        ]
    }
}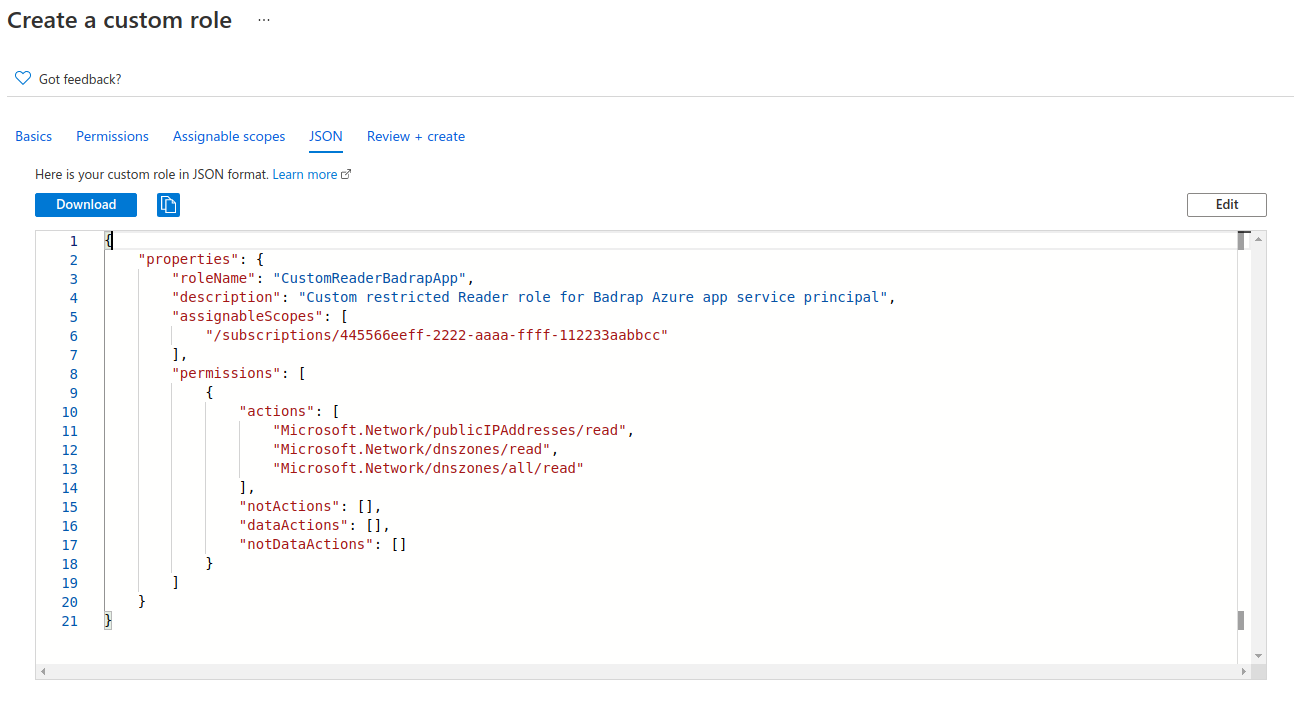
Review the custom role one more time in the Review+create tab, and then select Create.
Then, assign the custom role to the app service principal by following steps 8-10 above, but substituting your custom role name (e.g. "CustomReaderBadrapApp") in place of the Reader role in step 9.
After you have assigned the necessary role for the service principal, you need to create a client secret for the app. Under App Registrations, select the application you created.

Note down the Directory (tenant) ID and Application (client) ID values.

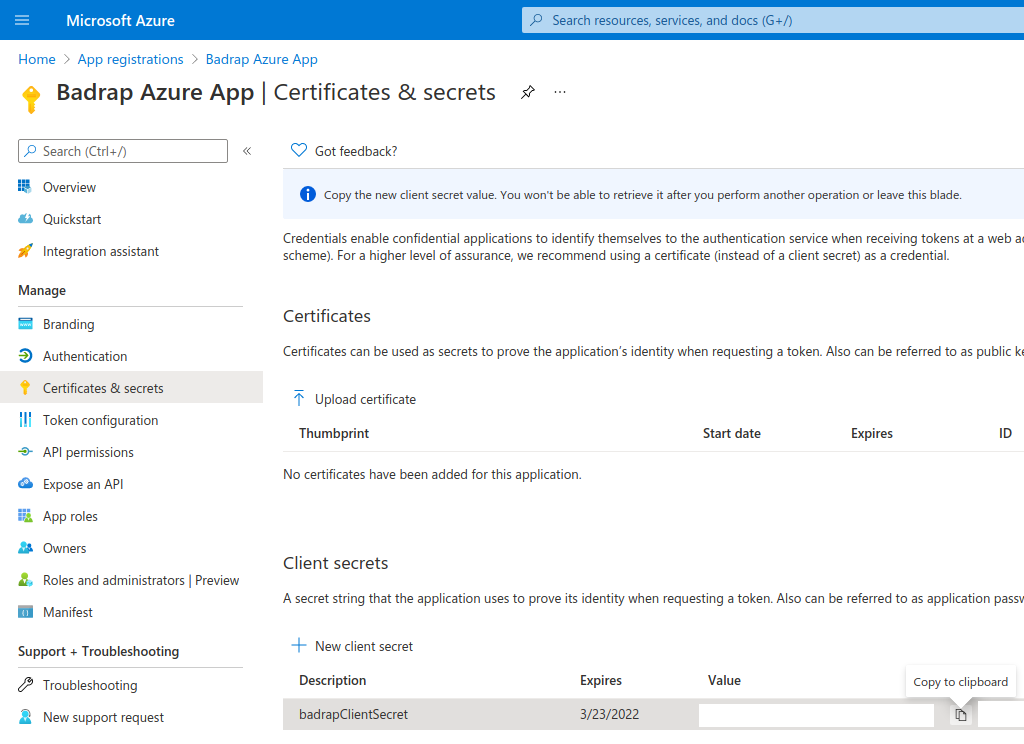
Under the same app, select Certificates and Secrets in the Manage menu.
Under "Client secrets", click on New Client Secret.
For the description field, you can use e.g.
badrapClientSecret. Select a suitable time for expiration (e.g. one year), and click Add.Note down the Value field from the generated client secret.
Under your Badrap Azure app settings, add a new account. Copy the Directory (tenant) ID, Application (client) ID and client secret values you noted down earlier into the Badrap Azure app settings.
Click Add account to save your settings.
In a few minutes after the app has been configured into use, you should see a listing of your Azure assets under My Assets.
Uninstalling the app
If you want to stop using the Badrap Azure app, you should uninstall it from your Badrap Azure app page. Then you can clean up the app configuration from your Azure AD installation using either Azure CLI or your Azure Portal dashboard.
Cleaning up via Azure CLI
- If you want to clean up your Azure configuration using the Azure CLI, just delete the service principal with the
az ad sp deletecommand:The output of the command should look like this:az ad sp delete --id http://BadrapAzureAppRemoving role assignments - If you assigned a custom role for the service principal during the app registration, you can delete the custom role with this CLI command:You've now successfully cleaned up your Azure configuration.
az role definition delete --name "CustomReaderBadrapApp"
Cleaning up via Azure Portal
If you want to clean up your Azure configuration using your Azure Portal, first log into the portal and select Azure Active Directory from the sidebar.
Navigate to App Registrations.

Click on the app that you created earlier, e.g. "Badrap Azure App".
Select Delete from the actions at the top.

This action will disable the app registration and move the app under the Deleted applications list on the App Registrations page.
To delete the app registration and all its dependencies permanently, go to "Deleted applications", select the application (e.g. "Badrap Azure App"), and then choose Delete permanently.

If you created a custom role for your service principal instead of using the default Reader role, go to "Subscriptions" view, select your subscription, go to the "Access control (IAM)" menu, select "Roles", search for your custom role (e.g. "CustomReaderBadrapApp"), select the custom role, and click "Remove".

You've now successfully cleaned up your Azure configuration.